— FAQs —
Ordering a personalized item with your pet's design is easy and fun! 🐶
- Stickers -
-
We make customize stickers from simple portraits to stickers for your flurry kid + loved ones. Simply send us a picture of your portraits with your dog (and maybe your car too!) with the “Template Details” provided at the order page . For more details, click on “Custom Order” page from the top right button.
**We only ship out the products after you review & approve the design**
-
Glossy White - Shiny with richer color appearance. Best for laptops, treats container, planner/journal
Transparent - Color appears like glossy sticker but printed on a transparent sticker - Best on window or glass for a clean look
Holographic - Printed on special vinyl sticker which creates unique iridescent/rainbow-like effect.
-
All stickers are water-resistant & tear-resistant. They can withstand normal wear & tear with amazing results.

High Contrast, Sharper Colors
Shiny with richer color appearance. Best for laptops, treats container, planner/journal
Transparent Background
Colors appear like glossy sticker but printed on a transparent sticker - Best on window or glass

Rainbow, Iridescent effects
Printed on special vinyl sticker which creates unique iridescent/rainbow-like effect.
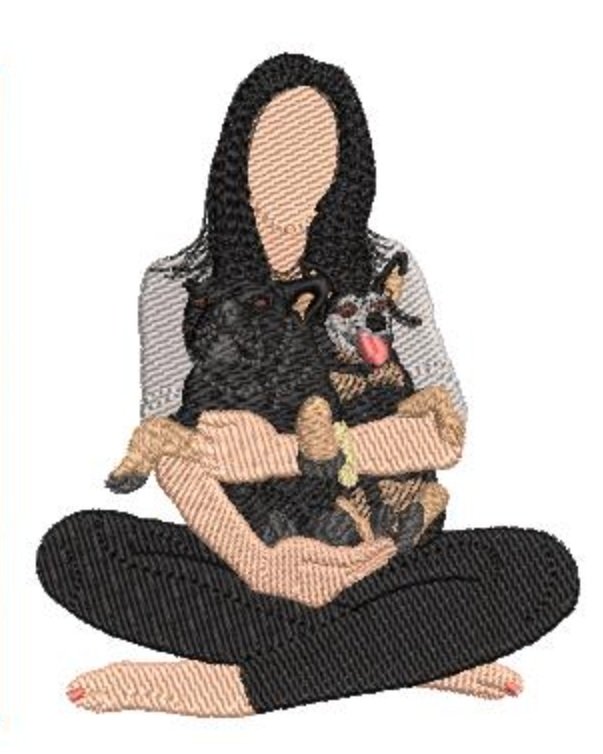
- Embriodery -
-
We make your customize portraits from the image you send to us .
Simply send us a picture of your portraits (human, dogs and any pets are welcome!❤️)
1) Check out the link-in Uniqlo website section of the item, to explore the color & sizing options for bags/ tees.
2) From the dropdown menu, select your preferred item size and color;
Choose the number of pets you want to be embroidered (for 3+ pet/ # option not available, DM Me to purchase);3) You can add your customize notes/ insturctions after hitting the “Add-To-Cart” Button.
4) Once you're 100% satisfied with your selections, proceed with the payment and get ready to receive a truly unique and cherished piece!
5) Don’t forget to send your image to “stickmup.co@gmail.com”
**Photo Guidelines: High resolution/ Close-Up/ Eye-Level/ Avoid cropped pic/ well-lit/ Unfiltered ****We only ship out the products after you review & approve the proof (Unlimited Edits)**
-
*Our pricing included a Set-Up Fee to be charged **PER DESIGN**
*A set-up fee is a one-off charge to turn each of your image or design into an digital stitch file.
NOTE: If you have ever purchased any embroidery design from us, set up fee of $35 of the **SAME DESIGN**
would be waived)For any questions, please DM/ email me.
-
T-Shirt
Sweatshirt
Hoodies
Moon Bag
2-Way Bag (Tote+Backpack)
They are all Unisex-Designs :)
-
Moon Bag/ 2-Way Bag: ~2.5” (H) x 2” (W)
Tshirt: Stitched out design measures ~3x3” (HxW), ensuring that your pet's features are beautifully captured.
-
Yes, of course! You can choose from:
Position: Left/ Right/ Middle of the chest
Additional pet(s): +$10/each pet
Name : Under portrait and/or at the sleeve can be added without extra chargesFont's choices: Please DM Me :)
-
YES, all pets are welcome! Please email me to ask away, with a pic ready in-hand and I'll review as soon as I can.
-
With global supply shortages, we do our best to stay ahead of inventory restocks. Due to demand, sometimes we sell out of a particular size and color combination, which may take months to replenish. For limited edition: once it’s gone, it's gone.
Sign up for notifications on the out of stock item and we’ll notify you once it’s back!
-
Our clothing sizes are all UNISEX.
Choose from small, medium, large, x-large sizes to get your desired look.
Our t-shirts run true-to-size. -
Human/ Pet portraits is welcomed!
Family + Pet Silhouette
Thoughtful unqie gift or keepsake for any couple, family and friends, or anyone who loss their pets :”)

Dog Portraits
“Bring Your Pets To Everywhere”
& wear your Pet near your Heart! ❤️

Families + Pet Silhouette
We can merge multiple pictures in one. You can add anyone you love/ lost or any pets in one. Please sepcoify anything you’d like to have included.
- Temporary Tattoo Stickers -
-
Same as custom stickers - We make custom tattoos from your favourite portraits (we hand-drawn all portraits, NOT by Adobe/ crop from photos)
1* Pick any item from “Custom Order” session & add to cart
2* Add another separate item(s) of “Custom - ALL PORTRAIT (Tattoos)”
+ Select a size (XS/ S/ M/ L)
+ Select quantity (1 = includes 6 temp tatts per set)>>> For more details, click on “Custom Order” page from the top right button.
-
All temp. tatts are 100% waterproof - able to withstand gentle wash under cold running water
(AND hot running water will definitely runs off the whole artwork, instantly).Otherwise, in regular wearing conditions, will look great for about 3-5 days, depending on the area of application (also depends how often it runs under water/ how often it’s being scrubbed)
-
We have super carefully picked the BEST quality of the tattoo papers which is “TÜV Rheinland Certified” - Passes safe testing of “Heavy Metal Content” & “Microbial contamination’” & complying with regulations related to cosmetic products.
-
Yes, they can be easily removed.! The most common method is to gently rub your skin with a little bit of cleaning oil/ alcohol and they will disappear in seconds.
-
Sizing for custom portraits varies - (approx. sizing as below: Square in H x W” / Rectangle in H x W”)
Extra Small - Up to 1 x 1" / 0.5 x 1.5"
Small - Up to 2 x 2” / 1.5 x 2.5”
Medium - Up to 3 x 3” / 2.5 x 3.5”
Large - Up to 4 x 4” / 3.5 x 4.5”
Recommended Sizing (In ref to which body part it will be applied on):
Extra Small - perfect sizing on inner wrist/ inner ankle / neck area behind ear loops
Small - perfect sizing on hand/ bicep/ forearm/ upper ankle
Medium/ Large - perfect sizing on thigh/ calf
-
We’re glad that you asked! Placement is a key factor on how long your tattoo can last.
✅ Tattoos, permanent and temporary - work best on a hairless, flat surface.
❌ NOT Recommended - rounded & bony area/ body parts that stretch significantly or crease
(e.g. elbow/ knees)/ area that often sweats or in contact with water (e.g. hands)❌ DO NOT apply the tattoo to sensitive areas such as face, neck, upper chest, or genitals
-
Be sure NOT to wash the area too much and pat dry rather than scrub when drying
They are waterproof, but will gradually reduce its shininess under water/ showering
Do NOT apply perfume, soap, oil or sunscreen on your temporary tattoo stickers
“How to Apply
Temporary Tattoo Stickers?”
Applying our temporary tattoo stickers is super easy.
We have prepared detailed instructions for you to obtain a perfect result (as below)
-
1 - What you need?
First, you need a sponge (or towel) & a little bit of water.
-
2- Prepare Skin.
Make sure your skin is clean, dry and free from any oils. It will be best to apply your Tempo Tattoo on a hairless area/ area with less scrubbing (e.g. BEST results on arms/ back/ upper ankles)
-
3 - Place & Remove (adhesive film)
Carefully peel the adhesive film off your temporary tattoo. Choose the perfect spot for your tattoo, and place the paper on your body with the image side on your skin/ facing down.
-
4 - Apply Water.
Get your towel or sponge wet and dab it on top of the tattoo paper, covering the entire tattoo. Hold this for 30-60 seconds to ensure the tattoo is transferred. Don't rush, great things take time.
-
5 - Remove (back paper)
Press the whole tattoo for a few seconds for the last time, slowly slide off the paper (DONT PEEL OFF!) and Voila! Your Temp Tattoo is ready to impress. Don't forget to let it air-dry for a few minutes!
-
6 - Final Tips.
Your temp tattoo is already dry and ready to show to the crowds, but you may want to apply a tiny bit of lotion over it. This can provide even more realism to your body art and increase its lifespan!
- Embriodery Patches -
-
Iron-on Patch
The adhesive backing of these patches get activated by heat. They can be applied using an iron, making them a convenient choice for those who do not want to sew their patches on.
Convenient and versatile to showcase personal style, or represent a group
Velcro-backed Patch
Hook-and-loop backing that can easily be attached and removed from the fabric. They are popular among military and law enforcement personnel for their ease of use.
**CUSTOMIZATION - COMING SOON**
We’re happy to customize any patch design for you! If you have a deadline please let us know in advance
(RUSH order fee may apply). -
S (2.5*2.5”)
M (3.5*3.5”)
L (3.9*3.9”)
-
Before you begin to iron anything onto your garment, please check what material it is made of.
✅ Patches can be ironed onto cotton, cotton blends, polyester, velour, denim and wool. For your safety, use a flat surface for ironing on a patch and follow any iron or patch instructions (as below).
❌ DO NOT apply iron-on patches to waterproof rainwear, rayon, nylon, velvet, acrylic, minky, leather, vinyl, or any other fabrics with finishes, elastics or heat sensitivity. If you're unsure, TEST with an iron on a hidden seam or hem to see if the fabric accepts the heat without damage.
-
YES, restoring the hat, bag or jacket to its original condition is poossible.
Check out this link on how-to: How to Remove Iron-On Patches
-
Whether you’re ironing patches on denim to ironing letters on clothes, follow these tips to ensure your patches are properly attached and last as long as possible.
Sewing vs Ironing on a Patch
Patches can be sewn onto fabric or garments with a single or double stitch along the border of the patch for extra security.
Ironing on a patch can have a cleaner look, but ironing and sewing can improve the longevity of the patch (especially for clothing, such as sewing and ironing patches on denim jackets).
Care & Maintenance
When washing fabric with iron-on patches attached, make sure you turn the garment inside out.
Never wash in hot water or dry with heat or you risk loosening the attached patch.
Repairs
If your patch is becoming loose, you can try to iron it on again, by repeating the iron patch instruction below…..If that doesn’t work, you will have to sew it on.
“How to Apply
Iron-On Patches?”
Iron On patches are the fastest, easiest way to attach custom patches to any garment.
With a few simple tips, you can rock great-looking custom patches.
-
1- Find right garment to apply on
Before you get started, make sure your fabric is a match. Iron-on patches work best with materials like cotton and polyester but can seriously damage fabrics like nylon, rayon, or rain-jacket material.
-
2- Prep the Iron
Preheat your iron to the temperature recommended (usually to the highest heat setting: 350°F) Be sure steam is OFF.
-
3- Position the Patch
Place the garment you want to attach the patch to on the ironing board or flat surface, & position the patch where you want it. Make sure the adhesive side of the patch is facing down (& peel it off after positioning)
-
4 - Use a Pressing Cloth
Place a damp (NOT soaking wet) thin cloth or parchment paper over the patch This will protect the patch and fabric from the direct heat of the iron.
-
5 - Press and Hold
Press the hot iron downward and hold it in place for ~30 seconds. Apply pressure evenly across the patch and ensure edges are securely affixed.
NOTE: Be careful not to move the iron around since this can inadvertently shift the position of the patch.
-
6 - Flip and Repeat
Lift the iron and check the patch. Once it’s affixed, turn the item of clothing inside out, with the reverse side of the patch. repeat step 5.
Allow the patch and material to cool completely (~5 minutes each for both sides) before wearing or washing.